Quick answer: yes — you can go from a Figma design to a working Flutter app in a single day by connecting Figma's Dev Mode MCP server to Cursor, letting the agent pull real layout, component, and design-token data straight from your file, then generating the app screen by screen instead of hand-coding every widget. This is the exact step-by-step workflow, prerequisites included.
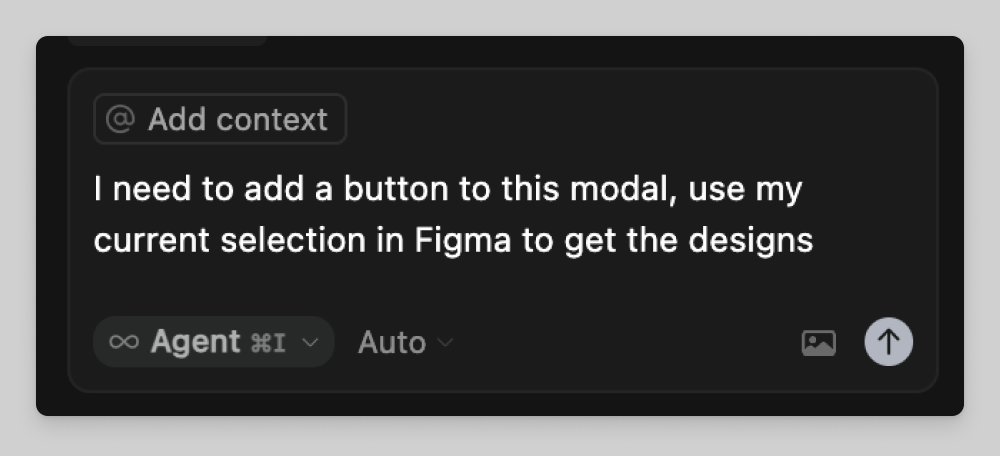
Selection-based prompting via the Figma Dev Mode MCP server. Source: Figma Developers.
Why this actually works now (and didn't a year ago)
Until recently, "AI-generated UI from a screenshot" meant an agent guessing at spacing, colors, and component structure from a flat image — close, but never pixel-accurate. The Model Context Protocol (MCP) changed that: Figma now exposes a Dev Mode MCP server that hands an agent the real design data — exact layout, component names, variables, typography, and spacing — instead of a picture it has to reverse-engineer. Cursor speaks MCP natively, which is what makes the one-day timeline realistic instead of a stretch.
What you need before you start
- A Figma design file with real screens (ideally already using Auto Layout and named components — messy, unstructured files give the agent worse data to work with).
- The Figma desktop app, updated to the latest version.
- Cursor IDE installed, on a plan with agent/Composer access.
- The Flutter SDK installed and a working
flutter doctor(no red flags). - About a day of focused, iterative work — this is guided generation, not a single button press.
Step 1: Prep your Figma file so the AI has clean data to read
Before touching Cursor, spend 15–20 minutes on the Figma side. Create one dedicated frame that
defines your theme — color styles, text styles, spacing tokens — and name your layers and
components sensibly (ButtonPrimary, not Rectangle 47). Auto Layout frames map far
more cleanly to Flutter's Row/Column/Flex widgets than absolutely
positioned elements do. This single prep step is the difference between clean generated code and a pile of
hardcoded pixel offsets.
Step 2: Enable the Figma Dev Mode MCP server
- Open the Figma desktop app and open your design file.
- Switch to Dev Mode (press
Shift+D, or use the toggle in the toolbar). - In the inspect panel, find the MCP server section and click Enable desktop MCP server.
- Figma confirms the server is running locally at
http://127.0.0.1:3845/mcp.
Step 3: Connect Figma to Cursor via MCP
- In Cursor, go to Settings → Cursor Settings → MCP.
- Click + Add new global MCP server.
- Paste this configuration (matching the local address Figma gave you):
{
  "mcpServers": {
    "figma-desktop": {
      "url": "http://127.0.0.1:3845/mcp"
    }
  }
}
Save it, and Cursor's agent can now pull live design context — components, variables, layout data, even Code Connect mappings — directly from the open Figma file.
Step 4: (Optional but recommended) add a Figma-to-Flutter MCP bridge
The generic Figma MCP server gives Cursor raw design data; a Flutter-specific bridge server on top of it
(the open-source figma-flutter-mcp project is a popular choice) additionally extracts theme
colors and typography into ready-to-use Dart tokens and nudges generated output toward idiomatic Flutter
widgets rather than a literal, brittle translation of the Figma layer tree. It's not required — Cursor
can work from the raw Figma MCP alone — but it noticeably cuts down on cleanup later.
Step 5: Give Cursor project rules before generating anything
Add a rules file (.cursor/rules or .cursorrules) describing your target
architecture before you generate your first screen: state management approach (Bloc, Riverpod,
Provider — pick one), folder structure (feature-first vs. layer-first), and shared theme conventions
(AppColors, AppTextStyles) pulled from your Step 1 theme frame. Without this,
every screen gets implemented in a slightly different style, and you'll spend day two on cleanup instead of
new features.
Step 6: Scaffold the Flutter project and theme first
Run flutter create, then do your first agent prompt against the theme frame only:
ask Cursor to generate your AppColors, AppTextStyles, and base
ThemeData from that frame's design tokens. Get this right before a single screen, since every
subsequent screen will reference it.
Step 7: Generate screens one at a time, not all at once
For each screen: select the frame in Figma (or copy its link), then prompt Cursor directly — something like "Implement this Figma frame as a Flutter screen using our existing AppColors/AppTextStyles and Bloc pattern." Cursor pulls the real layout data through MCP and writes the widget tree against it. Screen-by-screen beats "build the whole app" in one shot: smaller diffs, easier review, and the agent stays consistent with the pattern you approved on screen one.
Step 8: Wire up navigation and state between screens
Once individual screens exist, a second pass connects them: routing (go_router or Navigator 2.0), shared state between screens, and any API/data layer your design implied but couldn't show. This is the part that benefits most from you staying in the loop rather than trusting a fully autonomous run — navigation logic is exactly where agents most often guess wrong.
Step 9: Compare against the design and fix visual drift
Run the app in a simulator side-by-side with the Figma frame. Spacing, font weights, and color tokens translate very well through MCP; subtle things like custom shadows, gradients, or animation timing usually need a manual pass. Budget the last couple of hours of your day for exactly this kind of polish, not new screens.
Step 10: Test on a real device before calling it done
Simulators hide real-world issues — safe-area insets, keyboard overlap, actual touch target sizes. A quick pass on a physical device (or at minimum a couple of different simulator sizes) catches the layout bugs that only show up outside a fixed simulator viewport.
Is "one day" realistic, honestly?
For a focused app in the 10–20 screen range with a reasonably clean, well-structured Figma file: yes, genuinely achievable, especially if Step 1 (Figma prep) and Step 5 (project rules) aren't skipped. For a sprawling, 50+ screen enterprise app, treat "one day" as "one day per feature area" instead — the workflow scales, but the clock doesn't compress that far. The biggest single lever on your actual timeline is how disciplined your Figma file and your Cursor rules are before you generate the first line of code.
Common pitfalls
- Messy Figma files — unnamed layers and absolutely-positioned elements produce much worse generated code than Auto Layout frames with sensible names.
- Skipping the rules file — without it, every screen reinvents its own patterns, and reconciling them later costs more time than writing the rules up front.
- Generating the whole app in one giant prompt — smaller, screen-by-screen requests produce more reviewable, more consistent output than one massive generation pass.
- Trusting generated code without running it — treat every screen like a pull request from a fast but unfamiliar teammate: read it, run it, then move on.
FAQ
Can Cursor AI really convert a Figma design to Flutter automatically?
It generates real, working Flutter code from real Figma design data via MCP — not from a screenshot guess — but "automatically" still means agent-guided generation with you reviewing and connecting screens, not a single unattended click that outputs a finished app.
Do I need to already know Flutter to do this?
Basic familiarity helps a lot, mainly so you can read and sanity-check what the agent generates and catch mistakes (wrong state management pattern, a hardcoded value that should be a token, etc.). You don't need to be able to hand-write every widget yourself.
Should I use Figma's official MCP server or a Flutter-specific bridge like figma-flutter-mcp?
Start with Figma's official Dev Mode MCP server — it's the broadest, most maintained option and enough on its own. Add a Flutter-specific bridge on top only if you want extra automatic extraction of theme tokens and more idiomatic widget output; it's an enhancement, not a requirement.
Is the generated code production-ready, or does it need cleanup?
Expect a solid first draft, not a final PR. Layout and styling translate very well through MCP; business logic, edge cases, accessibility details, and animation polish typically still need a human pass before shipping.
Does this actually work for a large, complex app in one day?
Realistically, one day fits a focused app or a single feature area (10–20 screens) well. For larger apps, the workflow itself scales fine — you just repeat it feature area by feature area rather than compressing an entire enterprise app into a single day.
Is my Figma design data private when I connect it through MCP?
The desktop Figma MCP server runs locally on your machine (127.0.0.1), so your design data
isn't sent to a third-party server by the MCP connection itself — though whatever your AI model
provider does with the prompts you send is governed by that provider's own data policy, so check it if
you're working with sensitive, unreleased designs.
What Cursor plan or model do I need for this?
Any Cursor plan with agent/Composer access and MCP support works; the MCP connection itself doesn't require a specific model. For screen-by-screen generation, a capable default like Composer 2.5 is usually enough — save a heavier model like Claude Opus for screens with genuinely complex layout logic.
Further reading:
No comments
Post a Comment